
PHOTOSHOP
DAY 3
Today,
we’re going to put together separate elements to create the logo you see below!
When
you scroll down, you will find a finished image, and the separate elements
used to create it. You can right-click (ctrl+click mac) the images to save
them to your hard drive.
You’ll
be working in more than one layer. Remember, you can’t affect a layer unless
it’s the active layer. (To make a layer active, click it on the Layer’s
Palette)
|
|
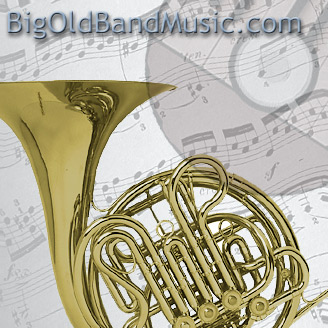
This is the final image. The text uses a drop shadow and an inner bevel effect. Don't worry about using the same exact font, just shoot for the same effect. Notice that different items are at
different transparencies. |
|
|
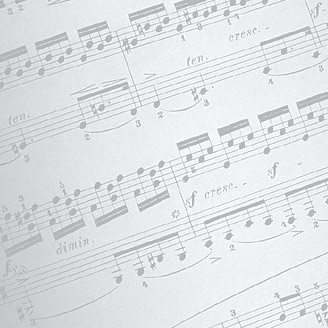
You can get the wavy effect seen in the final image by applying the Wave Filter. (FILTER-> DISTORT-> WAVE)
If you're using the trial version of photoshop,
you might not have the Wave filter. Use one of the interesting blur
filters instead. Go easy. |
|
|
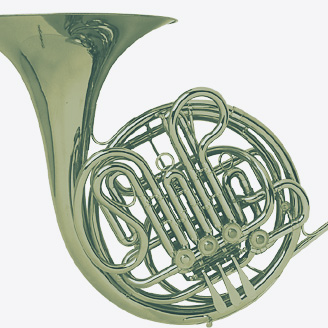
This image needs a lot of work. Compare
it to the finished one above. You’ll have to adjust the levels.
(IMAGE-> ADJUST-> LEVELS) You’ll also need to change the color.
Use either Variations (IMAGE-> ADJUST-> VARIATIONS), or Color Balance
(IMAGE-> ADJUST-> COLOR BALANCE). Go slowly. |
|
|
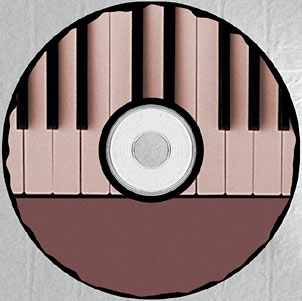
You’ll need to select, copy, and
paste the CD. Then you’ll need to resize it (EDIT-> TRANSFORM),
rotate it (EDIT-> TRANSFORM), and change it’s opacity on the
Layer Palette! |
Have Fun!!!!